Easy Peppermint Crochet Coasters: Free Pattern Tutorial
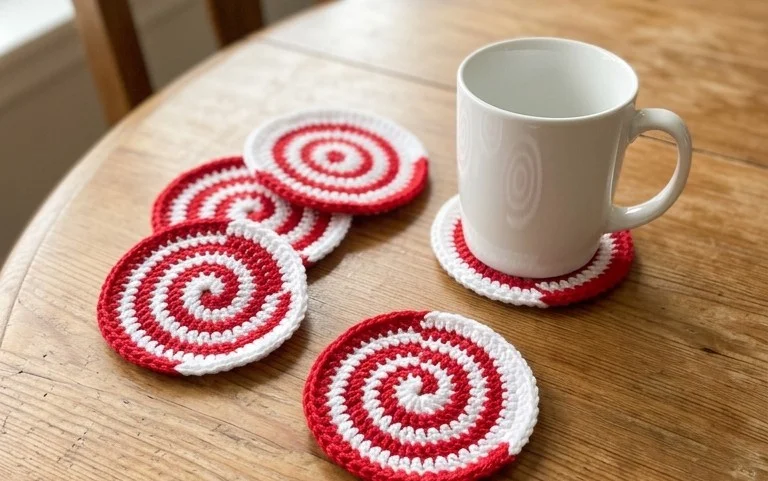
These peppermint coasters bring a classic holiday spirit to your coffee table with their crisp red and white stripes and sturdy, flat circular base. Made using simple single crochet stitches, they offer a dense texture that stands up to condensation from cold glasses or heat from mugs. Beginners find this project especially rewarding because it provides practice in managing circular increases while keeping tension even throughout each round. You will quickly master the technique of changing yarn colors while working, resulting in a clean finish that hides loose ends perfectly inside the body of your work.
Why You’ll Love This Pattern
This beginner-friendly crochet coaster pattern uses simple single crochet stitches and a tight tension to create a sturdy surface that protects your tables from moisture. It is a quick project that requires less than 20 yards of cotton yarn, making it an ideal choice for using up small leftover balls of yarn. Because the construction relies on standard circular increases, you will gain confidence in maintaining a flat, consistent shape while working in the round. These coasters make excellent handmade gifts for housewarmings or coffee lovers, especially when bundled with a mug.
I managed to finish a full set of four coasters in just one evening. The instructions are very clear, and my circles turned out perfectly flat without any curling.
— Sarah, hobbyist crocheter
Pattern Overview & Skill Level
- Skill Level: Beginner
- Approximate Time: 30 to 45 minutes per coaster
- Construction: Working in continuous rounds starting with a magic ring
- Finished Dimensions: Approximately 4 inches in diameter
Materials & Supplies Needed
- Yarn: Worsted weight (#4) cotton yarn. Cotton is preferred for its absorbency and heat resistance. You need approximately 15–20 yards per coaster.
- Hook Size: 4.5 mm (US 7) crochet hook.
- Notions: Tapestry needle for weaving in ends, a stitch marker to keep track of the first stitch in each round, and scissors.
- Safe Yarn Substitutions: You may use acrylic yarn, but note that it will not absorb moisture and may melt if exposed to very hot mugs. Wool yarn can be substituted for a felted look, but ensure it is a non-superwash variety if you plan to full the finished product.
Stitch Guide & Abbreviations (US Terms)
- MR: Magic Ring (a method of starting a round with an adjustable loop)
- ch: Chain
- sc: Single crochet
- inc: Increase (work 2 sc in the same stitch)
- sl st: Slip stitch (to join rounds)
- st(s): Stitch(es)
Step-by-Step Pattern Instructions
Coaster Body
- Rnd 1: Start with a MR and work 6 sc into the ring. Pull the tail tight to close the center. Place a stitch marker in the first st (6 sts).
- Rnd 2: Work 2 sc in each st around (12 sts).
- Rnd 3: 1 sc in next st, inc in next st repeat from * to * 6 times (18 sts).
- Rnd 4: 1 sc in each of next 2 sts, inc in next st repeat from * to * 6 times (24 sts).
- Rnd 5: 1 sc in each of next 3 sts, inc in next st repeat from * to * 6 times (30 sts).
- Rnd 6: 1 sc in each of next 4 sts, inc in next st repeat from * to * 6 times (36 sts).
- Rnd 7: Work 1 sc in each st around to create a smooth edge. Join with a sl st to the first sc (36 sts).
Finishing
Cut the yarn, leaving a 6-inch tail. Pull the tail through the final loop. Use a tapestry needle to weave the end securely into the back of the work. If you wish to create a textured edge, you can perform a final round of reverse single crochet (crab stitch) before fastening off.
Care & Washing Instructions
- Machine wash your cotton coasters on a gentle cycle in cool water to prevent shrinking.
- Lay the coasters flat on a clean towel immediately after washing to air dry, ensuring they retain their circular shape.
- Use a steam iron on a low setting if the edges begin to curl after multiple uses, pressing lightly to reshape the fibers.
Pro Tips & Common Mistakes to Avoid
Keep your tension consistent throughout the rounds to ensure the coaster lies completely flat; if your hands feel tight, take a break to loosen your grip. Always place a stitch marker in the first stitch of every round to avoid losing your place, as continuous rounds can be difficult to track visually. To weave in your ends invisibly, feed the yarn tail through the back loops of several stitches on the underside of the coaster before trimming the excess. If you want to make a larger coaster, simply continue the increase pattern by adding one additional sc between each increase in every subsequent round, but remember that this will require more yardage.
Frequently Asked Questions
Can I use a different yarn weight for this pattern?
Yes, you can use a lighter or heavier yarn, but your hook size and finished coaster size will change accordingly. If you use a sport weight yarn, switch to a 3.5 mm hook; for bulky yarn, try a 6.0 mm hook.
Why is my coaster curling at the edges?
Curling usually happens if your tension is too tight or if you are skipping increases. Check that you have exactly 6 stitches in Round 1 and that you are increasing by 6 stitches every round.
Is it okay to sell coasters made from this pattern?
Check the terms of service provided by the designer. Most designers allow the sale of finished items made from their patterns as long as you provide credit to the original creator.
How do I make the coasters thicker?
You can hold two strands of yarn together while crocheting with a larger hook, or you can crochet two identical circles and join them together with a round of slip stitches around the perimeter.
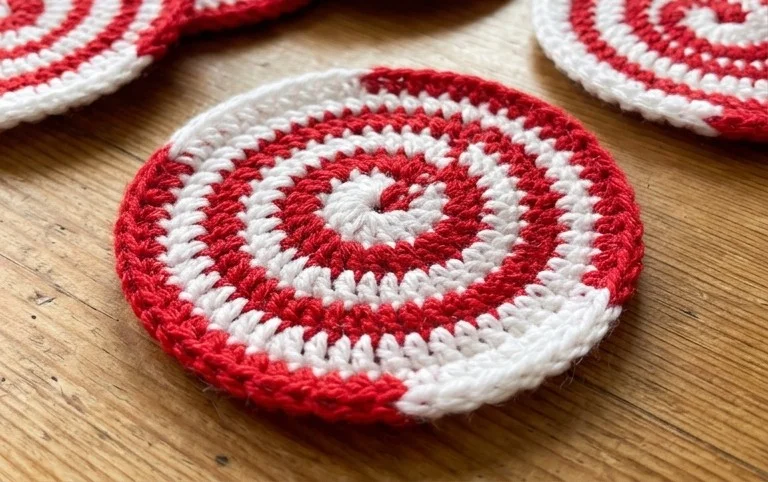
Seeing your stack of finished red and white discs sitting on the kitchen counter feels quite satisfying after an hour of focused stitching. Consider swapping the traditional holiday red for forest green or silver to match your year-round home decor theme better. Many makers love photographing their finished work with a warm latte, so please share a snapshot of your progress on social media. You can find more beginner-friendly projects like this in the pattern library on my blog whenever you want your next quick craft.